Posted on 16 Jan 2024 . 2 min read
Use a DatePicker when creating a view that enables users to choose both a calendar date and, if needed, a specific time.
In SwiftUI, you can use the DatePicker view to create a date picker. Here's an example of how to create a date picker and read values from it in SwiftUI:
import SwiftUI
struct ContentView: View {
@State private var selectedDate = Date()
var body: some View {
VStack {
DatePicker("Select a date", selection: $selectedDate, in: ...Date(), displayedComponents: [.date, .hourAndMinute])
.datePickerStyle(WheelDatePickerStyle())
.labelsHidden()
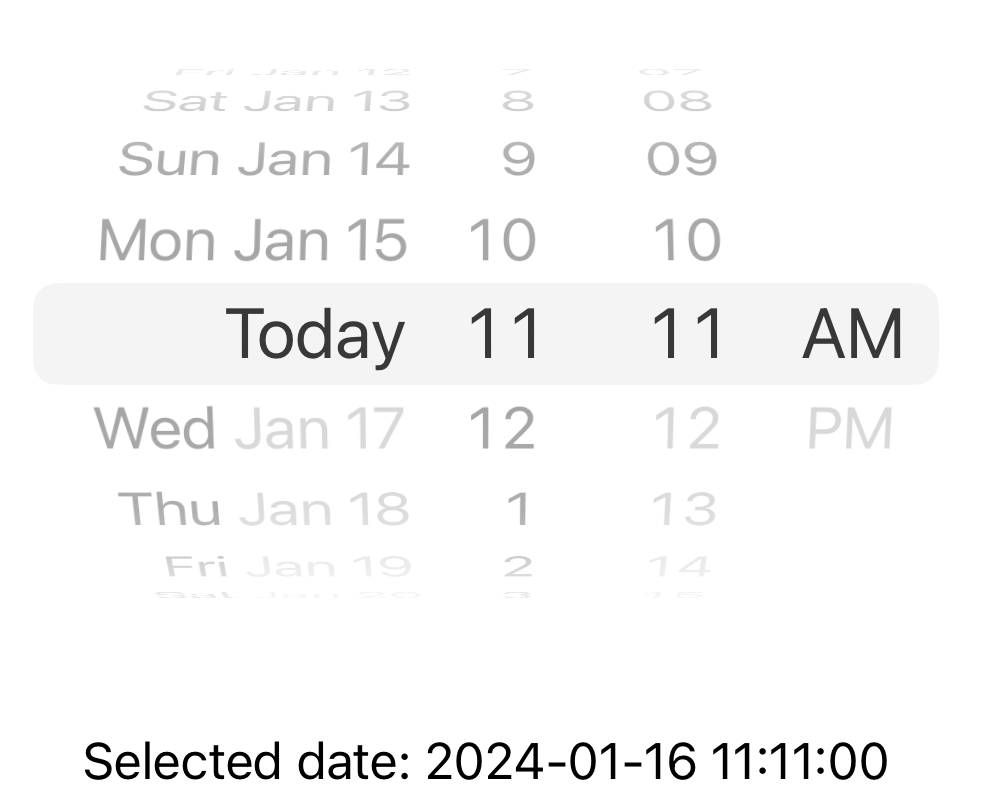
Text("Selected date: \(formattedDate)")
.padding()
}
}
private var formattedDate: String {
let dateFormatter = DateFormatter()
dateFormatter.dateFormat = "yyyy-MM-dd HH:mm:ss" // Choose your desired format
return dateFormatter.string(from: selectedDate)
}
}
struct ContentView_Previews: PreviewProvider {
static var previews: some View {
ContentView()
}
}Explanation
- @State private var selectedDate = Date(): This declares a state variable to store the selected date.
- DatePicker: This is the SwiftUI view for the date picker. The selection parameter binds the selected date to the selectedDate state variable. The in parameter can be used to set a range of selectable dates. The displayedComponents parameter specifies which components of the date should be displayed.
- datePickerStyle(WheelDatePickerStyle()): This applies a wheel-style appearance to the date picker. You can choose a different style based on your preferences.
- labelsHidden(): This hides the default labels associated with the date picker.
- Text("Selected date: \(formattedDate)"): Displays the selected date in a Text view.
- The formattedDate property formats the selected date using a DateFormatter.
Results
The bottom line
Remember to replace the date format in the dateFormatter.dateFormat property according to your needs.
This example provides a basic structure for a SwiftUI date picker. You can further customize the appearance and behavior of the date picker based on your application's requirements.
Don’t hesitate to contact me if you have any questions or queries. Follow me on twitter @gurjitpt for any updates.
Thanks!
Share this article
Written By

Gurjit Singh
I’m Computer Science graduate and CompTIA Security+ certified SOC Analyst and Mobile Application Security Engineer with 10+ years of cross-platform development experience across iOS, Android, and web.
Discover articles by topics
SwiftUI Class Struct Networking XCode NSCache Enum Optionals Property Observers Closures Guard Reviews StoreKit App Store Algorithms Testing Operators Protocol Extensions Weak Unowned SwiftData WWDC23 GCD API Admob SwiftLint Lottie Foreach Objective-C UIKit NavigationSplitView